이전 글: 2022.03.16 - [개발/reactive] - [reactive] 4-1. java Future/FutureTask/Callable/Runnable
[reactive] 4-1. java Future/FutureTask/Callable/Runnable
callable vs runnable interface Runnable interface Callable interface java version package java 1.0 ~ java.lang java 1.5 ~ java.util.concurrent return 계산 결과를 받을 수 없음 계산 결과 받을 수 있음(..
bangpurin.tistory.com
이전 글과 오늘 글은 아래 유튜브를 보고 작성하였다.
1. using Spring Async
@Slf4j
@EnableAsync  //있어야 async 작동
@SpringBootApplication
public class Spring {

    @Component
    public static class MyService{
        //future인데 등록해서 받아볼 수 있게하는, 스프링이 만든 ListenableFuture
        //요청할 때 마다 스레드를 계속 만들어 비효율적인 simpleAsyncTaskExecutor -> 빈으로 풀 등록해서 쓰자
        //비동기가 여러개고 스레드 풀을 분리해서 지정하고 싶으면 Async("name") 지정 가능
        @Async
        public ListenableFuture<String> hello() throws InterruptedException {
            log.info("hello()");
            Thread.sleep(2_000);
            return new AsyncResult<>("hello");
        }
    }

    //task executor를 빈으로 해두면 알아서 가져가서 쓰게 되어있음
    @Bean
    ThreadPoolTaskExecutor threadPoolExecutor(){
        ThreadPoolTaskExecutor te = new ThreadPoolTaskExecutor();
        te.setCorePoolSize(10);//기본으로 만드는거; 첫번째 스레드 요청이 올 때; jmx를 통해 런타임에도 값 수정이 가능
        te.setQueueCapacity(200);//기본 풀이 다 차면 큐에 먼저 차
        te.setMaxPoolSize(100);//큐가 꽉 찼을 때 에러나는데 그걸 막아주려고 하는 설정
        te.setThreadNamePrefix("async-");
        te.initialize();
        return te;
    }

    public static void main(String[] args) {
        //try with resource로 실행하면 작업 후 알아서 종료
        try(ConfigurableApplicationContext c = SpringApplication.run(Spring.class, args)){

        }
    }

    @Autowired MyService myService;

    //모든 빈 등록 마치면 바로 실행 됨
    @Bean
    ApplicationRunner run() {
        return args -> {
            log.info("run()");
            ListenableFuture<String> f = myService.hello();
            f.addCallback(s -> System.out.println(s), e -> System.out.println(e.getMessage()));
            log.info("Exit");
        };
    }
}
여기서 주의할 점.
ThreadPoolTaskExecutor에 max pool size에 설정하는 값은 큐가 다 차고 나서 늘어가는 풀 사이즈이다.
https://www.baeldung.com/java-threadpooltaskexecutor-core-vs-max-poolsize
참고로 HttpServletRequest/Response -> 자바의 InputStream 을 구현한 것으로, blocking방식이다.

2. using Spring Web - default
우선 서버 설정 값
#서블릿 스레드
server.tomcat.threads.max=1
#작업스레드풀?
spring.task.execution.pool.core-size=100
@Slf4j
public class LoadTest {
static AtomicInteger cnt = new AtomicInteger(0);
public static void main(String[] args) throws InterruptedException {
ExecutorService es = Executors.newFixedThreadPool(100);
RestTemplate rt = new RestTemplate();
String url = "http://localhost:8080/callable";
StopWatch sw = new StopWatch();
sw.start();
for(int i = 0; i <100; i++){
es.execute((() -> {
int idx = cnt.addAndGet(1);
log.info("thread {}", idx);
StopWatch s1 = new StopWatch();
s1.start();
rt.getForObject(url, String.class);
s1.stop();
log.info("elapsed:{} -> {}", idx, s1.getTotalTimeSeconds());
}));
}
es.shutdown();
es.awaitTermination(100, TimeUnit.SECONDS);
sw.stop();
log.info("total time {}", sw.getTotalTimeSeconds());
}
}@RestController
public static class MyController{
@GetMapping("/callable")
public String callable() throws InterruptedException {
log.info("async");
Thread.sleep(2_000);
return "hello";
}
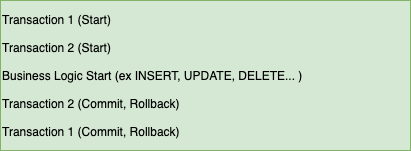
}위 요청은 아래 그림과 같이 표현된다.

load test는 100개의 스래드를 만들어 거의 동시에 요청했으나, 순차 처리로 인해 총 소요 시간은 200초가 넘는다.
...
13:04:56.428 [pool-1-thread-50] DEBUG org.springframework.web.client.RestTemplate - HTTP GET http://localhost:8080/callable
13:04:56.427 [pool-1-thread-65] DEBUG org.springframework.web.client.RestTemplate - HTTP GET http://localhost:8080/callable
13:04:56.428 [pool-1-thread-3] DEBUG org.springframework.web.client.RestTemplate - HTTP GET http://localhost:8080/callable
13:04:56.427 [pool-1-thread-90] DEBUG org.springframework.web.client.RestTemplate - HTTP GET http://localhost:8080/callable
...
13:08:04.993 [pool-1-thread-61] DEBUG org.springframework.web.client.RestTemplate - Response 200 OK
13:08:04.993 [pool-1-thread-61] DEBUG org.springframework.web.client.RestTemplate - Reading to [java.lang.String] as "text/plain;charset=UTF-8"
13:08:04.994 [pool-1-thread-61] INFO toby.live.lecture4.LoadTest - elapsed:61 -> 188.612548654
13:08:06.999 [pool-1-thread-82] DEBUG org.springframework.web.client.RestTemplate - Response 200 OK
13:08:06.999 [pool-1-thread-82] DEBUG org.springframework.web.client.RestTemplate - Reading to [java.lang.String] as "text/plain;charset=UTF-8"
13:08:06.999 [pool-1-thread-82] INFO toby.live.lecture4.LoadTest - elapsed:82 -> 190.618529907
13:08:09.002 [pool-1-thread-71] DEBUG org.springframework.web.client.RestTemplate - Response 200 OK
13:08:09.002 [pool-1-thread-71] DEBUG org.springframework.web.client.RestTemplate - Reading to [java.lang.String] as "text/plain;charset=UTF-8"
13:08:09.003 [pool-1-thread-71] INFO toby.live.lecture4.LoadTest - elapsed:71 -> 192.622624014
13:08:11.009 [pool-1-thread-32] DEBUG org.springframework.web.client.RestTemplate - Response 200 OK
13:08:11.009 [pool-1-thread-32] DEBUG org.springframework.web.client.RestTemplate - Reading to [java.lang.String] as "text/plain;charset=UTF-8"
13:08:11.009 [pool-1-thread-32] INFO toby.live.lecture4.LoadTest - elapsed:32 -> 194.629844982
13:08:13.012 [pool-1-thread-35] DEBUG org.springframework.web.client.RestTemplate - Response 200 OK
13:08:13.012 [pool-1-thread-35] DEBUG org.springframework.web.client.RestTemplate - Reading to [java.lang.String] as "text/plain;charset=UTF-8"
13:08:13.013 [pool-1-thread-35] INFO toby.live.lecture4.LoadTest - elapsed:35 -> 196.631976988
13:08:15.015 [pool-1-thread-59] DEBUG org.springframework.web.client.RestTemplate - Response 200 OK
13:08:15.015 [pool-1-thread-59] DEBUG org.springframework.web.client.RestTemplate - Reading to [java.lang.String] as "text/plain;charset=UTF-8"
13:08:15.016 [pool-1-thread-59] INFO toby.live.lecture4.LoadTest - elapsed:59 -> 198.634385976
13:08:17.018 [pool-1-thread-65] DEBUG org.springframework.web.client.RestTemplate - Response 200 OK
13:08:17.018 [pool-1-thread-65] DEBUG org.springframework.web.client.RestTemplate - Reading to [java.lang.String] as "text/plain;charset=UTF-8"
13:08:17.019 [pool-1-thread-65] INFO toby.live.lecture4.LoadTest - elapsed:65 -> 200.638424197
/callable 쪽은 요청을 거의 동시에 100개의 요청을 받았지만 일반 동기 방식이므로 하나씩 처리한다.
...
2022-03-17 13:08:06.998  INFO 22518 --- [nio-8080-exec-1] toby.live.lecture4.SpringWeb             : async
2022-03-17 13:08:09.002  INFO 22518 --- [nio-8080-exec-1] toby.live.lecture4.SpringWeb             : async
2022-03-17 13:08:11.008  INFO 22518 --- [nio-8080-exec-1] toby.live.lecture4.SpringWeb             : async
2022-03-17 13:08:13.012  INFO 22518 --- [nio-8080-exec-1] toby.live.lecture4.SpringWeb             : async
2022-03-17 13:08:15.014  INFO 22518 --- [nio-8080-exec-1] toby.live.lecture4.SpringWeb             : async
3. callable
/callable 쪽만 소스를 수정한다.
@RestController
public static class MyController{
    @GetMapping("/callable")
    public Callable<String> callable() throws InterruptedException {
        log.info("callable");
        //Callable Interface 익명 클래스
        return () -> {
            log.info("async");
            Thread.sleep(2_000);
            return "hello";
        };
    }
callable은 요청을 받으면 별도의 스레드를 생성해 일을 병렬로 처리한다.

100개의 스래드가 거의 동시에 요청을 보내 100개의 작업 스래드가 받아서 동시에 처리하기 때문에 총 소요시간도 2초 남짓이다.
...
13:33:24.694 [pool-1-thread-63] INFO toby.live.lecture4.LoadTest - elapsed:63 -> 2.289299445
13:33:24.694 [pool-1-thread-30] INFO toby.live.lecture4.LoadTest - elapsed:30 -> 2.291355199
13:33:24.695 [pool-1-thread-67] INFO toby.live.lecture4.LoadTest - elapsed:67 -> 2.292713823
13:33:24.695 [pool-1-thread-81] INFO toby.live.lecture4.LoadTest - elapsed:80 -> 2.289499954
13:33:24.695 [pool-1-thread-3] INFO toby.live.lecture4.LoadTest - elapsed:3 -> 2.290040178
13:33:24.695 [pool-1-thread-57] INFO toby.live.lecture4.LoadTest - elapsed:57 -> 2.292708376
13:33:24.696 [pool-1-thread-44] INFO toby.live.lecture4.LoadTest - elapsed:44 -> 2.29307173
13:33:24.696 [main] INFO toby.live.lecture4.LoadTest - total time 2.307467369
/callable이 1개의 서블릿 스레드로 받았지만 별도의 작업 스래드로 바로 토스하여 일을 하는 모습..
...
2022-03-17 13:33:22.624  INFO 23081 --- [nio-8080-exec-1] toby.live.lecture4.SpringWeb             : callable
2022-03-17 13:33:22.624  INFO 23081 --- [        task-98] toby.live.lecture4.SpringWeb             : async
2022-03-17 13:33:22.625  INFO 23081 --- [nio-8080-exec-1] toby.live.lecture4.SpringWeb             : callable
2022-03-17 13:33:22.625  INFO 23081 --- [        task-99] toby.live.lecture4.SpringWeb             : async
2022-03-17 13:33:22.625  INFO 23081 --- [nio-8080-exec-1] toby.live.lecture4.SpringWeb             : callable
2022-03-17 13:33:22.625  INFO 23081 --- [       task-100] toby.live.lecture4.SpringWeb             : async

4. DeferredResult
DeferredResult란 “지연된 결과”를 의미하며 외부의 이벤트 혹은 클라이언트 요청에 의해서 지연되어 있는 HTTP 요청에 대한 응답을 나중에 써줄 수 있는 비동기 작업이다.
기존에 /callable api가 있던 곳에 아래와 같이 신규 api를 추가해준다.
Queue<DeferredResult<String>> results = new ConcurrentLinkedQueue<>();

@GetMapping("/dr")
public DeferredResult<String> dr(){
    log.info("dr");
    //DR은 setResult가 오기전 까지 응답을 끊지 않고 대기, 그래서 테스트 시 타임아웃 시간을 길게
    //결과가 오면 바로 return
    DeferredResult<String> dr = new DeferredResult<>(600_000L);
    results.add(dr);
    return dr;
}

@GetMapping("/dr/count")
public String drcount(){
    return String.valueOf(results.size());
}

@GetMapping("/dr/event")
public String drevent(String msg){
    for(DeferredResult<String> dr: results){
        dr.setResult("hello " + msg);
        results.remove(dr);
    }
    return "OK";
}
load test에 /dr을 쏘게끔 설정하고 실행하면 100개의 요청을 우르르 보내지만 아무 응답을 받지 않고 대기하는 모습을 보이는데
이때 /dr/count를 쏴보면 100개의 요청이 큐에 들어있는 것을 확인할 수 있다.
그 상태에서 /dr/event?msg=today 를 요청하면 그제야 100개의 응답이 한 번에 온다. setResult라는 이벤트를 주면 리턴하는 방식이다.
...
13:48:17.039 [pool-1-thread-98] INFO toby.live.lecture4.LoadTest - elapsed:98 -> 213.022709247
13:48:17.039 [pool-1-thread-30] INFO toby.live.lecture4.LoadTest - elapsed:30 -> 213.027111781
13:48:17.039 [pool-1-thread-16] INFO toby.live.lecture4.LoadTest - elapsed:16 -> 213.026715767
13:48:17.040 [pool-1-thread-1] INFO toby.live.lecture4.LoadTest - elapsed:1 -> 213.025866684
5. ResponseBodyEmitter
ResponseBodyEmitter는 하나의 요청에 대한 응답을 여러번에 나눠서 보낼 때 사용된다.
//여러번에 나눠서 데이터를 보낸다
@GetMapping("/emitter")
public ResponseBodyEmitter emitter(){
    ResponseBodyEmitter emitter = new ResponseBodyEmitter();
    Executors.newSingleThreadExecutor().submit(() -> {
        try {
            for(int i =0; i<=50; i++){
                emitter.send("<p> stream " +i+ "</p>");
                Thread.sleep(100);
            }
        } catch (Exception e) {
            e.printStackTrace();
        }
    });
    return emitter;
}
/emitter를 브라우저로 실행하면 stream 문구가 100ms 마다 계속 뜨는 것을 볼 수 있다. 위에 상태 표시에도 로딩으로 되어 있어 계속 응답을 받아오고 있음을 알 수 있다.
참고
https://jongmin92.github.io/2019/03/31/Java/java-async-1/
자바와 스프링의 비동기 기술
해당 포스팅은 토비님의 토비의 봄 TV 8회 스프링 리액티브 프로그래밍 (4) 자바와 스프링의 비동기 기술 라이브 코딩을 보며 따라했던 실습 내용을 바탕으로 정리한 글입니다. 실습 코드들은 Inte
jongmin92.github.io
'개발 > reactive' 카테고리의 다른 글
| [reactive] 6. refactoring (0) | 2022.03.21 |
|---|---|
| [reactive] 5. 비동기 RestTemplate과 비동기 MVC/Servlet (0) | 2022.03.18 |
| [reactive] 4-1. java Future/FutureTask/Callable/Runnable (0) | 2022.03.16 |
| [reactive] 3. reactive streams - schedulers (0) | 2022.03.03 |
| [reactive] 2. reactive streams - operators (0) | 2022.02.25 |